centos下apache+django配置多个网站

之前就已经写过一篇《在linux服务器上部署django项目》,在那篇博文里,我用的操作系统是ubuntu的,而且没有配置域名,直接在一台服务器下放的一个网站,而且用的是mod_wsgi的全局模式。今天的这篇,我将使用mod_wsgi的daemon mode,而且配置多个网站–一个域名对应多个网站。

我的环境:

centos6.7
Apache/2.2.15
python2.7.12
django1.9.7
mod_wsgi4.5.3

本文的前提是环境已经配好了,如果没有配好,可以参考《在linux服务器上部署django项目》。

接下来,以2个django项目,1个php项目为例,进行网站的配置。

2个django项目的地址:

/mywebsite/django1
/mywebsite/django2

php项目的地址

/mywebsite/myphp

使用mod_wsgi的daemon mode

这个例子,我们将第一个django项目配置到服务器上,使用mod_wsgidaemon mode

对应的httpd.conf文件应该这么写:

<VirtualHost *:80>
     ServerName lookfor404.com           # 域名 
     WSGIDaemonProcess django1 python-path=/mywebsite/django1
     WSGIProcessGroup django1
     WSGIScriptAlias / /mywebsite/django1/yourproject/wsgi.py   #在 /mywebsite/django1 下,project和app在同一级目录
    <Directory /mywebsite/django1/yourproject>
       <Files wsgi.py>
          Order Deny,Allow
          Allow from All
       </Files>
    </Directory>

   #别忘了静态文件配置,这个和一般的php项目是类似的
    Alias /static "/your/path/collectedstatic"
    <Directory "/your/path/collectedstatic">
        Order deny,allow
        Allow from all
    </Directory>
</VirtualHost>

但是据测试,有时候可能会出现错误,在log里面提示如下:

Permission denied: mod_wsgi (pid=10458): Unable to connect to WSGI daemon process ‘lookfor404’ on ‘/etc/httpd/logs/wsgi.10453.0.1.sock’ as user with uid=11.

逛了半天的stackoverflow,最终看到一个靠谱的答案提到这个网址,
https://code.google.com/archive/p/modwsgi/wikis/ConfigurationIssues.wiki#Location_Of_UNIX_Sockets

解决方法就是,在virtualhost外面加多一句
WSGISocketPrefix /var/run/wsgi

一个域名对应多个网站

接下来,看看怎么用一个域名配置多个网站。

比如,我想要的效果是这样的:访问lookfor404.com/django1,进入django1这个项目;访问lookfor404.com/django2,进入django2这个项目;访问lookfor404.com/myphp,进入myphp这个项目。同样的,直接看配置文件。为了看起来清楚,我把静态文件设置先忽略了。

#----------django1项目配置
<VirtualHost *:80>
     ServerName lookfor404.com           # 域名 
     WSGIDaemonProcess django1 python-path=/mywebsite/django1
     WSGIProcessGroup django1
     #注意,以下发生变化,即第二个参数为访问的路径
     WSGIScriptAlias /django1 /mywebsite/django1/yourproject/wsgi.py   
    <Directory /mywebsite/django1/yourproject>
       <Files wsgi.py>
          Order Deny,Allow
          Allow from All
       </Files>
    </Directory>
</VirtualHost>

#----------django2项目配置
<VirtualHost *:80>
     ServerName lookfor404.com           # 域名 
     WSGIDaemonProcess django2 python-path=/mywebsite/django2
     WSGIProcessGroup django2
     #如下,即访问url为lookfor404.com/django2
     WSGIScriptAlias /django2 /mywebsite/django2/yourproject/wsgi.py   
    <Directory /mywebsite/django2/yourproject>
       <Files wsgi.py>
          Order Deny,Allow
          Allow from All
       </Files>
    </Directory>
</VirtualHost>

#----------myphp项目配置
<VirtualHost *:80>
     ServerName lookfor404.com   # 域名 
     DocumentRoot /mywebsite/myphp
     <IfModule alias_module>
          #设置访问url为lookfor404.com/myphp
          Alias /myphp "/mywebsite/myphp"
         <Directory "/mywebsite/myphp">
          AllowOverride all
          Order allow,deny
          Allow from all
         </Directory>
      </IfModule>
</VirtualHost>

总结来说,这种配置适用于你只有一个域名,而你有多个网站程序,而且你不使用子域名。对于django项目,通过WSGIScriptAlias的第一个参数就可以设定访问的域名子路径了,对于php项目,使用Alias即可解决问题。

另外,多个域名多个网站这种情况就不说了,直接在servername里设置就行。

django项目出现WSGI Bad Bad Request (400) 错误

最后还要说一下这个错误,明明之前一切配置都顺利,用ip访问也没问题,但是一用域名访问就出错了,原来是新版django的问题,需要到setting.py里面设置可访问的域名:

ALLOWED_HOSTS = [
‘lookfor404.com’, # 只允许主域名
‘.lookfor404.com’, # 允许主域名以及子域名
‘.lookfor404.com.’, # 允许FQDN以及子域名
]

然后重启一下apache就行了。
 

在Centos6.7中将python升级成2.7版本

在Centos6.7中将python升级成2.7版本,网上有一大堆文章,但是要知道,没有永远正确的配置,每台机子,每个软件版本可能都不一样,所以要针对自己的问题,记录,找出对应的原因,才能以不变应万变啊。

不废话了,我这里记录一下在64位centos6.7中将python2.6.6升级为python2.7.12的过程。

1.安装devtoolset

devtoolset可以帮助我们解决gcc编译的问题,而在yum中,我们直接使用groupinstall,就能把工具组给安装了,很方便,输入以下命令:

yum groupinstall "Development tools"

2.安装编译Python需要的包:

yum install zlib-devel
yum install bzip2-devel
yum install openssl-devel
yum install ncurses-devel
yum install sqlite-devel

3.下载python2.7.12:

wget https://www.python.org/ftp/python/2.7.12/Python-2.7.12.tgz

4.解压:

tar -xvf Python-2.7.12.tgz

然后进入该目录:

cd Python-2.7.12

5.开始编译安装三部曲

./configure --prefix=/usr/local --enable-shared
make
make install

如果遇到错误:

error while loading shared libraries: libpython2.7.so.1.0: cannot open shared object file: No such file or directory

那就新建一个文件:

vim /etc/ld.so.conf.d/python2.7.conf

加入以下内容:

/usr/local/lib

保存退出后运行命令读取配置:

ldconfig

然后再重新编译安装三部曲即可。

看到网上很多教程有说,安装完新版本的python,系统还是用的默认的旧版本,所以需要更改软连接,还有yum的设置。但在我这里并没有遇到,我是可以直接用了,而且yum也正常。可能和python的版本有关,如果你在安装完之后出现,运行python,发现版本仍然是默认的版本,那么你就需要更改软连接了,更改完软连接之后,要检查yum是否正常。

6.安装pip

在windows下,装完python2.7.12会默认把pip也装上。但在linux上有所不同,至少我在完成以上步骤之后,运行pip并没有反应。所以还需要安装pip。直接用yum神器:

yum install python-pip

7.安装python-devel

输入命令安装就行:

yum install python-devel

这就基本上就完成了python的升级。

centos+apache安装wordpress

上一篇《折腾记录:将wordpress搬家到腾讯云》讲到wordpress服务器搬家的坑,但是没有细说怎么安装,这一篇就记录一下怎么在centos上面安装使用wordpresss吧。以下的过程是基于centos6.7的,如软件安装有版本出入(ubuntu里面的apache是apache2,不是httpd),需要自行调整。

1.安装apache

在centos下,一般都使用yum来管理安装包,很方便。安装apache非常简单,输入以下命令即可:

yum install httpd
yum install httpd-devel

开启apache服务:

service httpd start

默认会显示如下提示:

Starting httpd: httpd: Could not reliably determine the server’s fully qualified domain name, using 127.0.0.1 for ServerName

此时需要去更改配置:

vim /etc/httpd/conf/httpd.conf

#ServerName www.example.com:80改为ServerName localhost:80

保存,退出,重启apache服务
service httpd restart

最后再设置一个开机自动启动:
chkconfig httpd on

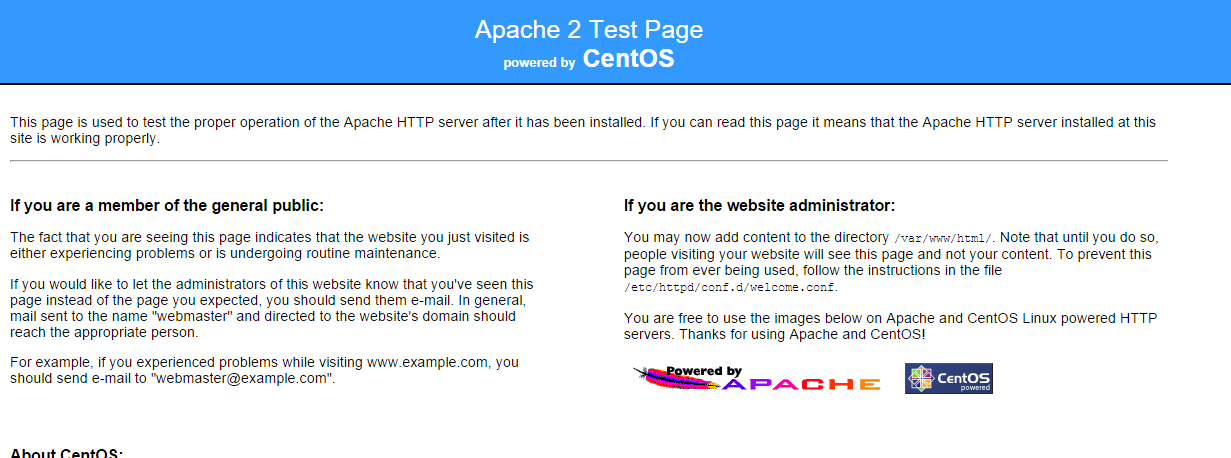
ok,在浏览器输入服务器的ip,显示如下页面即为安装成功:

apache安装成功

2.安装mysql

输入命令安装mysql-server、mysql和mysql-devel:

yum install -y mysql-server mysql mysql-devel

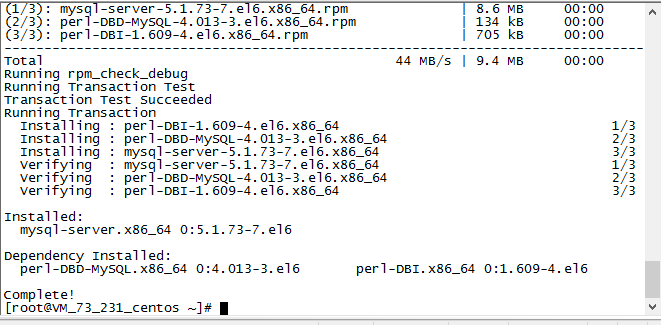
安装成功,如下图:

mysql安装完成

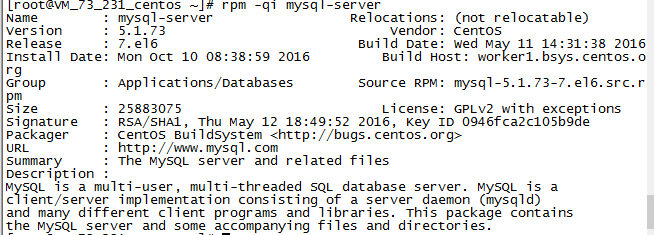
查看一下mysql的版本:

rpm -qi mysql-server

mysql版本-1

启动mysql服务:

service mysqld start

设置mysql的超级管理员root的密码,引号不要删,引号内为你的密码:
/usr/bin/mysqladmin -u root password 'new-password'

或者在mysql登陆状态下,输入:
use mysql;
update user set password=password('密码') where user='root';
flush privileges;

设置mysql开机启动:
chkconfig mysqld on

如果你还需要在远程的软件操作mysql,那就要开启远程操作权限,在mysql命令行下,输入:
grant all privileges on *.* to 'root'@'%' identified by '密码' with grant option;
flush privileges;

3.安装php

输入命令:

yum install php

安装php

安装php-mysql:
yum install php-mysql

安装常用的php组件:
yum install php-gd php-imap php-ldap php-odbc php-pear php-xml php-xmlrpc

安装常用的php组件

重启apache:
service httpd restart

搞定。

4.安装配置wordpress

4.1创建wordpress数据库

先创建一个数据库,用来存放wordpress的数据。可以在navicat-for-mysql里面创建,也可以在登陆mysql之后,用命令行创建(指定utf-8字符集):
CREATE DATABASE `wordpress` DEFAULT CHARACTER SET utf8 COLLATE utf8_general_ci;

创建个专门的用户管理这个数据库(username和password改为你要的用户名和密码):
CREATE USER 'username'@'localhost' IDENTIFIED BY 'password';

将wordpress数据库的所有管理权限交给这个用户:
GRANT ALL ON wordpress.* TO ‘username’@’localhost’;

ok

4.2下载、安装、配置wordpress以及数据库

下载wordpress,可以去官网下载,然后上传到服务器,也可以直接用命令下载,我这里用命令下载(以下是英文版,中文版的话将url改成https://cn.wordpress.org/latest-zh_CN.tar.gz):
wget http://wordpress.org/latest.tar.gz --no-check-certificate

解压到指定的目录下:
tar -zvxf latest.tar.gz -C /website/wp-test

cd进入解压后的文件目录,将wp-config-sample.php复制、重命名为wp-config.php:
cp wp-config-sample.php wp-config.php

修改wp-config.php:
vim wp-config.php

更改数据库的相关设置,更改红色字体处为你自己的数据库设置:

/** 数据库名 */
define(‘DB_NAME’, ‘wordpress‘);

/** mysql用户名 */
define(‘DB_USER’, ‘username‘);

/** 该用户对应的密码 */
define(‘DB_PASSWORD’, ‘password‘);

/** 主机名,默认无需修改 */
define(‘DB_HOST’, ‘localhost’);

/** 字符集 */
define(‘DB_CHARSET’, ‘utf8‘);

/** The Database Collate type. Don’t change this if in doubt. */
define(‘DB_COLLATE’, ”);

4.3apache虚拟主机设置

新建一个虚拟主机配置:
vim /etc/httpd/conf.d/virtual.conf

输入以下配置,记得要先将域名解析到主机的ip地址来:

##wordpress目录
DocumentRoot /website/wp-test/wordpress

ServerName lookfor404.com #你的域名

ServerAlias www.lookfor404.com #域名别名

#开启rewrite功能
<Directory “/website/wp-test/wordpress”>

AllowOverride ALL

Order allow,deny

Allow from all


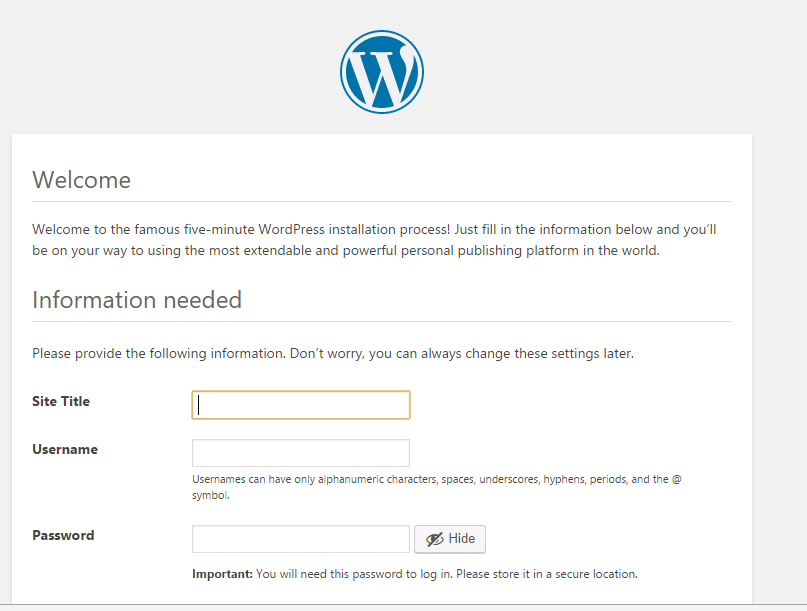
以上配置完成,访问域名,即可开始安装过程。
wordpress安装过程

设置一下账号密码,就可以开启wordpress了。